Difference between revisions of "Comparison of QGIS to ArcMap"
| Line 19: | Line 19: | ||
For the purpose of this tutorial, QGIS will be the example used to compare directly to ESRI's ArcMap. |
For the purpose of this tutorial, QGIS will be the example used to compare directly to ESRI's ArcMap. |
||
| − | < ArcMap version 10.5.1 will be used > |
+ | < ''ArcMap version 10.5.1 will be used'' > |
== Purpose == |
== Purpose == |
||
Revision as of 11:52, 18 October 2017
- Note: original tutorial of least cost path using QGIS and GRASS had to be scrapped due to GRASS not working after many many attempts at making it work.
Introduction
ESRI's ArcMap is a useful piece of software that can be used to create maps and perform various types of analysis. Unfortunately, it is an extremely expensive piece of software that not everyone can realistically afford; making it inaccessible.
As an alternative to ArcMap, many turn to Free Open Source Software (FOSS) in order to complete mapping and analysis. Through the use of FOSS, there are huge savings in costs and similar -- if not the same functions are still able to be used. There are many options for substitution of ArcMap to FOSS, all with varying effectiveness and suitability.
A few examples include:
- QGIS
- MapGuide
- Bentley Geo Web Publisher
- etc.
For the purpose of this tutorial, QGIS will be the example used to compare directly to ESRI's ArcMap.
< ArcMap version 10.5.1 will be used >
Purpose
To compare vector based tools between costly ArcMap and FOSS QGIS.
Methods
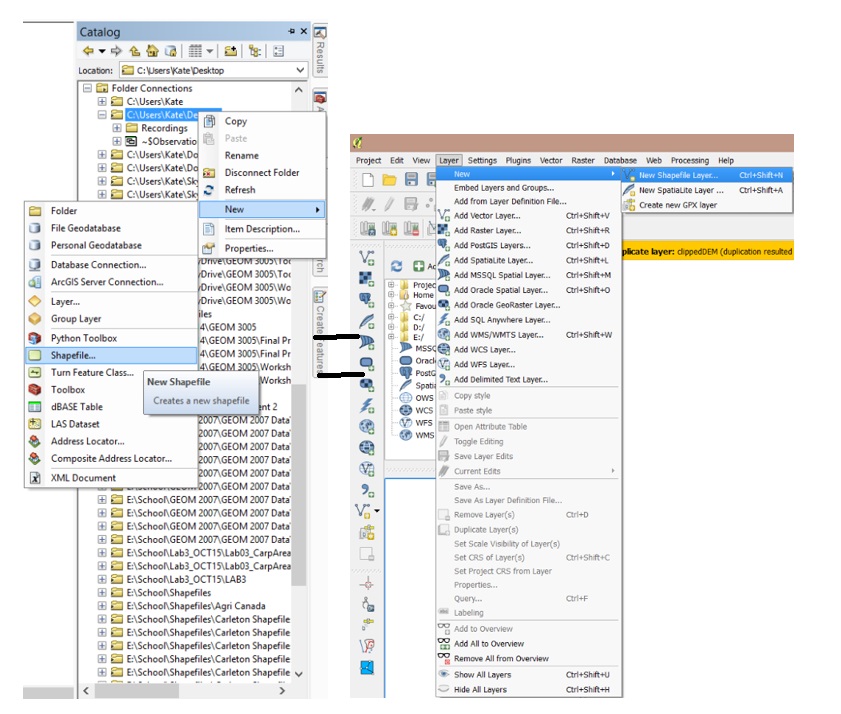
For this tutorial, a comparison will be shown, with the ArcMap button/action on the left side and QGIS on the right, and will be displayed like so: ArcMap = QGIS
Adding Shapefiles
QGIS offers multiple buttons to upload data, so, ensure that the correct button is pressed, whether it be for vector data or raster data. For the purposes of this tutorial, we are not using any previously downloaded or acquired data, but digitizing our own.
Digitizing
For the purposes of this tutorial, we are looking at digitizing our own data, so to do so, we need to create new shape files using the following steps.
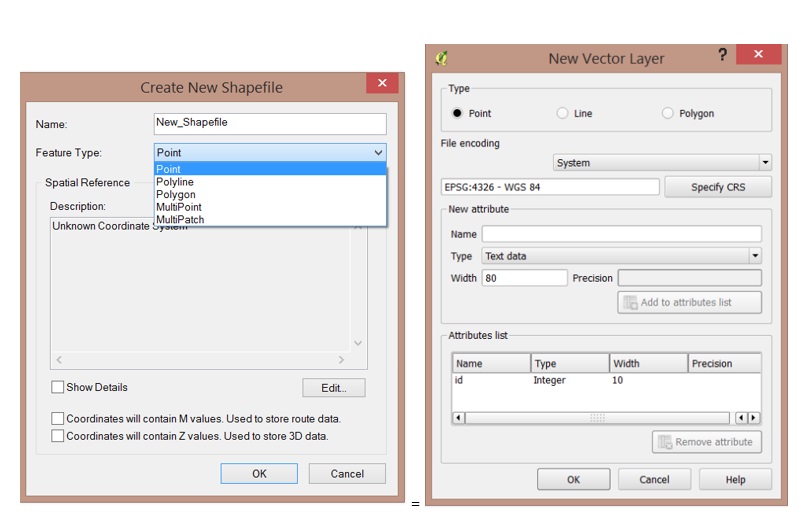
In both software, the one location can create polygon, polyline and points, and a coordinate system is to be chosen.
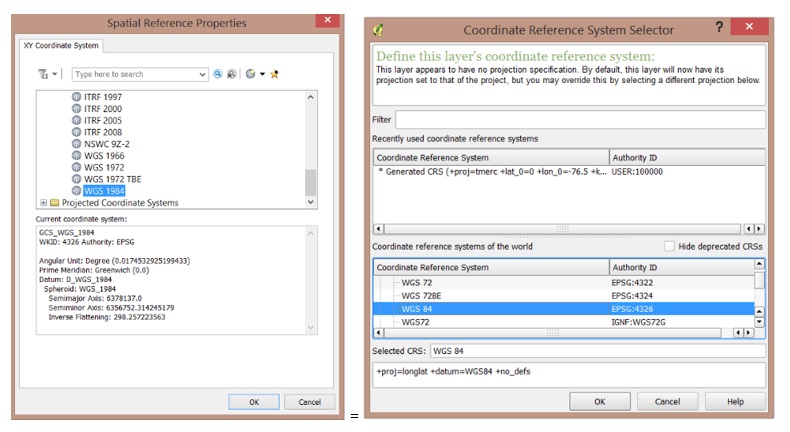
ArcMap categorizes the coordinate systems by projection and geographic, while QGIS offers all under one dropdown box.
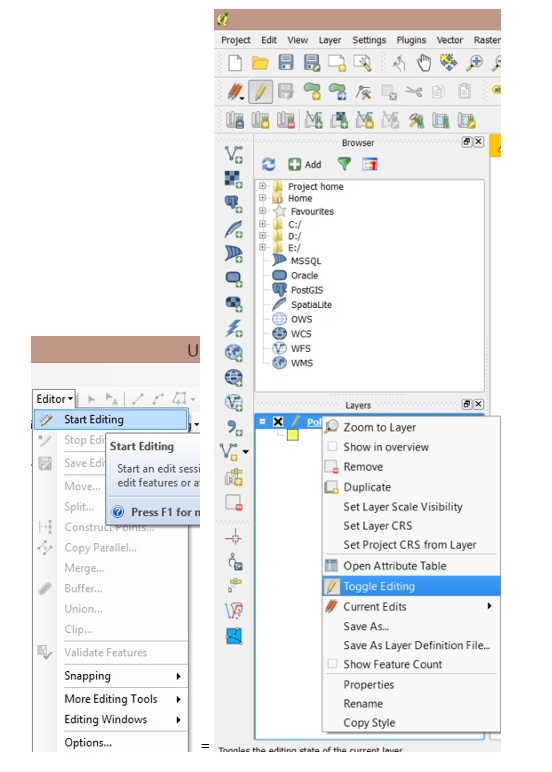
From there, the shapefiles have been created. Now, we can edit the shapefiles. In Arcmap, you are to go through the editor, while in QGIS, right clicking on the layer will bring up a drop down box, in which toggle editing is to be selected.
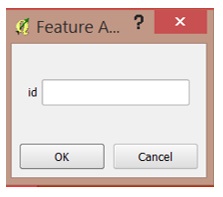
To begin digitizing, in ArcMap you are to create features, and then create the polygon/line/point. In QGIS, once right clicking and selecting toggle editing, select add feature: ![]() and the polygon/line/point can be digitized on screen. To do so, move your curser to the desired location and either trace, or create the shapes desired. To complete the polygon, right click, and the following box will come up:
and the polygon/line/point can be digitized on screen. To do so, move your curser to the desired location and either trace, or create the shapes desired. To complete the polygon, right click, and the following box will come up:
Give your polygon its own Id number and the polygon will then be complete and on your screen.
Tools
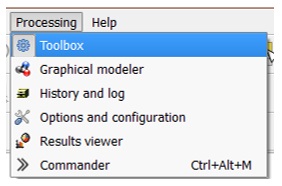
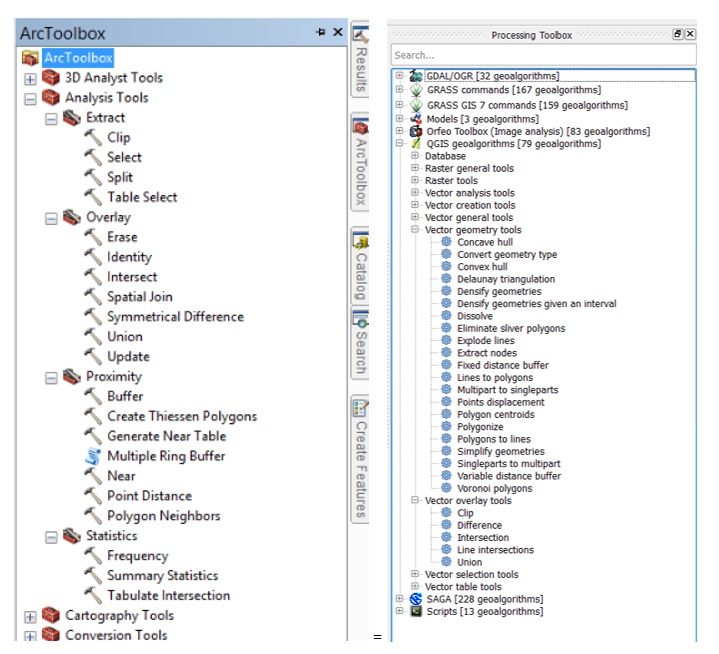
QGIS’ toolbox can be accessed by clicking processing then toolbox in the top menu bar. The toolbox will be located on the right side of the screen.
When clicking on the toolbox button, tools for various programs will popup with the number of tools that can be accessed. For QGIS, there are 79 tools that can be used.
While you may pay more and get more with ArcGIS, some essential tools are included in QGIS at no cost.

