Spatial data management using PostGIS
Contents
Introduction
In a postindustrial society, data is undeniably the most important asset that an organization possesses that allows it to conduct operations on a daily basis. Data is the foundation of many outcomes for tasks conducted in organizations that often enhance decision-making. The gravity of data is not solely confined to large organizations conducting business, data is also an important asset for research organizations, for the scholar, and for the home business entrepreneur, et cetera. In a postindustrial society which has put an emphasis on gathering and analyzing data, there has been over the years a multitude of innovations specializing in the discipline of data management.
In this tutorial, data management will be introduced for a specific data type known as spatial data. Spatial data, unlike regular data or other forms of data, has the purpose of representing the geographic location of features & boundaries using coordinates and topology.( Webopedia - Spatial Data )[1]. Furthermore, spatial data requires its own stream of technology for data management, which distinguishes it even more from other forms of data.
The intent of this tutorial will be to demonstrate the basic aspects of the discipline of data management specific to spatial data within a spatial database,followed by demonstrating what can be achieved using a spatial database in terms of advanced functionality. In addition to the primary intent, the entire tutorial will be conducted utilizing FOSS4G software and open source software; FOSS4G is an acronym for Free and Open Source Software for Geospatial. The benefit of giving a tutorial completely in open source software is that anyone can participate, because the software is free of charge. Here is a list of the open source software that will be utilized in this tutorial:
- Ubuntu
- PostgreSQL
- PostGIS
- Quantum GIS
- Open Jump
This tutorial's target audience is individuals with little to no knowledge of database management software, but with some experience in the field of Geomatics.
Data
In this tutorial, all the data was acquired from geobase.ca for the Ottawa region. For simplicity, it is suggested to download identical or similar data from Geobase.
The data utilized in this tutorial, can be found at www.geobase.ca, under National Hydro Network by simply performing a search for "02LH000", and downloading the ESRI Shapefile. In order to download data from Geobase, it is necessary to have an account, but the accounts are freely available.
In the dataset that was downloaded, only three files were used;
- NHN_02LH000_1_2_HN_NLFLOW_1 which was renamed to streams
- NHN_02LH000_1_2_HD_WATERBODY_2 which was renamed to waterbodies
- NHN_02LH000_1_2_WORKUNIT_LIMIT_2 which was renamed to extent
About the Tutorial
The tutorial will be divided into four main modules, with one optional module. The modules are as follows;
- Installation of PostgreSQL (Windows and Linux(Ubuntu)), PgAdmin 4(Windows Only) & PostGIS
- Uploading Data
- Retrieving Data
- Advance Functionality & Data Processing
- PostGIS Raster Functionality (Optional)
The tutorial will first pass through the Windows method followed by Linux. Linux commands will often be used for execution of procedures. If these commands and their functionalities are unclear, please refer to the external links section which will direct you to a command help page. You can also write man in the terminal followed by the command to get an instant help page.
Example of using man (manual):
man sudo
Installation
In this section we will show you how to install PostgreSQL and PostGIS on Windows as well as, Linux (Unbuntu).
- With Windows we will also install pgAdmin to manage our database.
PostgreSQL
Windows
1) Download PostgreSQL Installer for Windows
- Go to the download page of PostgreSQL installers on the EnterpriseDB.
- Download the PostgreSQL for Windows x86-64 version 16.0 (or the latest version (Version 17 is not yet compatible with PostGIS)).
- Download the PostgreSQL for Windows x86-64 version 16.0 (or the latest version (Version 17 is not yet compatible with PostGIS)).
2) Install PostgreSQL on Windows step-by-step
- For this you need to have administrator privileges.
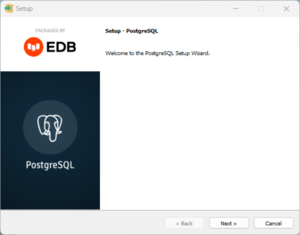
- Double-click the installer file and an installation wizard will appear and guide you through multiple steps. Hence, you can choose various options based on your preferences for PostgreSQL.
- Click the Next button.
You should see the following
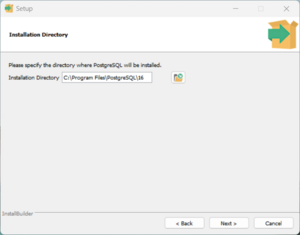
- Specify the installation directory by either choosing your preferred location or using the default folder suggested by the PostgreSQL installer and click the Next button
- Select software components to install:
- PostgreSQL Server option allows you to install the PostgreSQL database server.
- PostgreSQL Server option allows you to install the PostgreSQL database server.
- pgAdmin 4 option allows you to install the PostgreSQL database GUI management tool.
- pgAdmin 4 option allows you to install the PostgreSQL database GUI management tool.
- Stack Builder provides a GUI that allows you to download and install drivers that work with PostgreSQL.
- Stack Builder provides a GUI that allows you to download and install drivers that work with PostgreSQL.
- Command Line Tools option allows you to install command-line tools such as psql, pg_restore, and so on. These tools allow you to interact with the PostgreSQL database server using the command-line interface.
- Command Line Tools option allows you to install command-line tools such as psql, pg_restore, and so on. These tools allow you to interact with the PostgreSQL database server using the command-line interface.
In this tutorial we will be using Stack Builder to install PostGIS. As such, make sure it is installed. At this stage you can also install pgAdmin 4 which will be used to manage the database.
- Choose the database directory to store the data, or accept the default directory.
- Click the Next button to proceed to the next step:
- Enter the password for the database superuser (postgres)
- After entering the password, retype for confirmation, and then click the Next button:
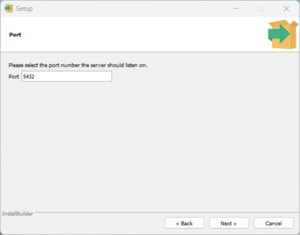
- Specify a port number on which the PostgreSQL database server will listen. The default port of PostgreSQL is 5432. Ensure that no other applications are using this port.
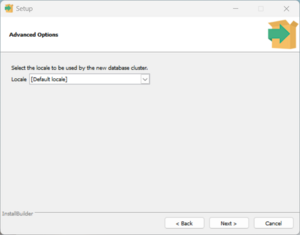
- Select the default locale for the PostgreSQL server. If you leave it as the default, PostgreSQL will use the operating system locale.
- Afterward, click the Next button.
- The setup wizard will show the summary PostgreSQL information. Review the details, and if everything is correct, click the Next button. Otherwise, click the Back button to adjust the configuration accordingly.
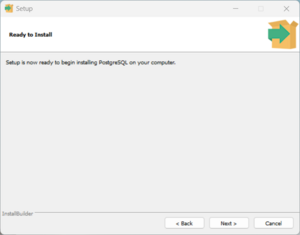
- Now, you are ready to install PostgreSQL on your computer.
- Click the Next button to initiate PostgreSQL installation.
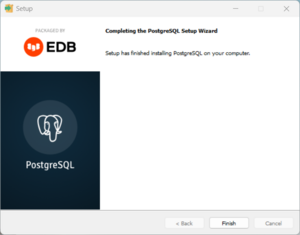
- The installation may take a few minutes to complete.
- Once completed click the Finish button to complete the PostgreSQL installation.
Linux Unbuntu
The first part of the installation for developing a spatial database, is the installation of PostgreSQL. This will be performed using what is known as the synaptic package manager, but via the terminal. (command line)
- In the Applications menu (top-left), in accessories click terminal. A terminal will open.
- In the terminal enter the following line;
sudo apt-get install postgresql postgresql-client postgresql-contrib pgadmin3
- This line will get and install packages for postgresql, the postgresql-client, postgresql-contrib, and pgadmin3. The postgresql package is the database itself, the postgresql-client is the client to communicate to the database from the shell(terminal), the postgresql-contrib is a library of additional tools for postgresql, and pgadmin3 is a gui interface that will easily allow user interaction with the database.
- Following the execution of that command, PostgreSQL will be installed on your computer.
- A quick test to ensure the database works, enter the following command in the terminal to temporarily "turn you into" the newly installed postgres system user, so you have control over the overall database:
sudo su postgres
- you should see the following;
- The following procedure will create a user for the PostGreSQL database.
- Enter the following command within the terminal, to create a new database user ( PostgreSQL - Documentation)[2].
createuser -sP [enter username]
- This command will create a new user within the database environment; the -s & P before the name of the new user are parameters that will make the user a superuser and prompt the user for a password to ensure a password is set.
- Enter the following in the postgresql-client to exit the PostgreSQL user's shell prompt, returning you to your own user account.
exit
PgAdmin *Optional
pgAdmin4 should have been installed when installing PostgreSQL. If you unchecked the box this is how you can install it separately.
pgAdmin is the leading open source management tool for PostgreSQL, the world’s most advanced open source database. pgAdmin 4 is designed to meet the needs of both novice and experienced Postgres users alike, providing a powerful graphical interface that simplifies the creation, maintenance, and use of database objects.(1)
PgAdmin is available for multiple platforms (PgAdmin Download Page)
- In this tutorial we will use it for Windows.
Windows
1) Download PgAdmin
- Go to the Windows download page. (Windows Download Page)
- Download pgAdmin 4 v8.12 (or the latest version). [PgAdmin4 v8.12-x64 Direct Download]
- Download pgAdmin 4 v8.12 (or the latest version). [PgAdmin4 v8.12-x64 Direct Download]
2) Install PgAdmin 4 on Windows step-by-step
- For this you need to have administrator privileges.
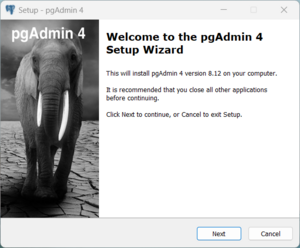
- Double-click the installer file and an installation wizard will appear and guide you through multiple steps.
- Click the Next button.
You should see the following
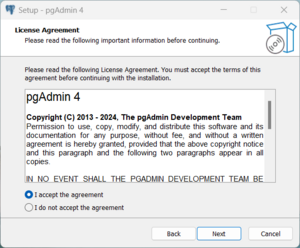
- Read Through the license agreement and select "I accept the agreement" before clicking the Next button.
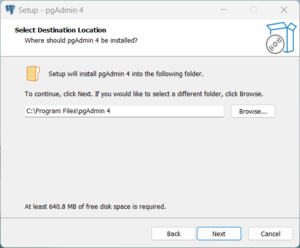
- Specify the installation directory by either choosing your preferred location or using the default folder suggested by the PgAdmin 4installer and click the Next button.
- In our case we will continue using the default folder.
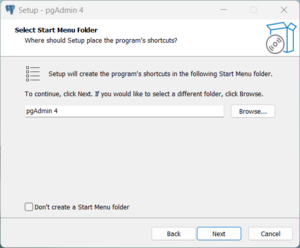
- Select if you would like the program to create a shortcut within the start menu folder.
- In our case we do want to create a Start Menu Folder.
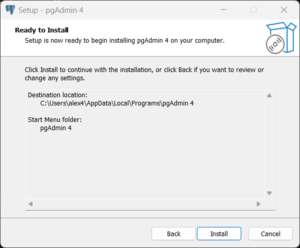
- The setup wizard will show the summary PgAdmin 4 information. Review the details, and if everything is correct, click the Next button to Install. Otherwise, click the Back button to adjust the configuration accordingly.
- The installation may take a few minutes to complete.
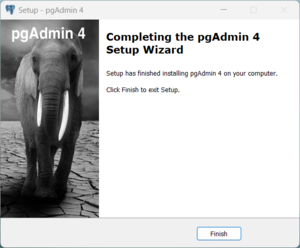
- Once completed click the Finish button to complete the pgAdmin 4 installation.
PostGIS
PostGIS is a spatial database extender for the open source PostgreSQL database.( Obe, Regina O. & Leo S. Hsu. 2010. PostGIS in Action. Manning Publishing.)[2]. This extender is what will grant the capability to manage spatial data within the PostgreSQL database.
Windows
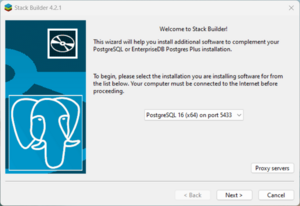
To install PostGIS on Windows we will use the Stack Builder Application which was installed during the PostgreSQL segment.
- Open Stack Builder and an installation wizard will appear and guide you through multiple steps. Hence, you can choose various options within Stack Builder based on your preferences (It is suggested to follow the same steps shown bellow to not run into any issues).
- Begin by selecting PostgreSQL 16(Or the version you want) from the drop down menu, followed by clicking the Next button.
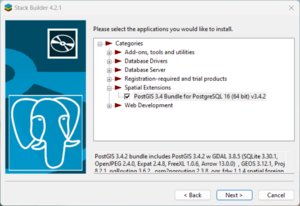
- This next page will display a variety of applications of which you can install. In our case go to the Spatial Extensions drop down menu and select PostGIS 3.4 Bundle for PostgreSQL 16. Then Click Next.
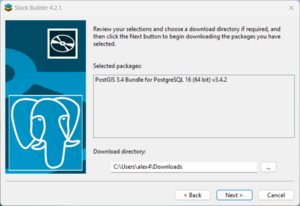
- A page displaying the selected packages will appear. Make sure PostGIS is selected and chose the location in which you want it to be downloaded. In our case the downloads folder was chosen.
- Clicking the Next button should prompt the installation of said packages (Should only take a few seconds).
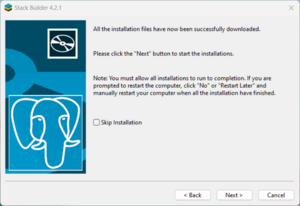
- A page displaying that the files have been successfully downloaded should appear. Click Next.
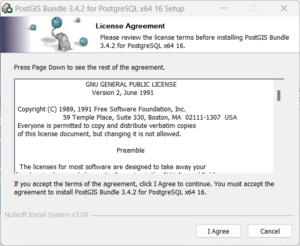
- A new page should have appeared. This is the PostGIS Bundle for PostgreSQL setup page. First read through the license agreement and select I Agree.
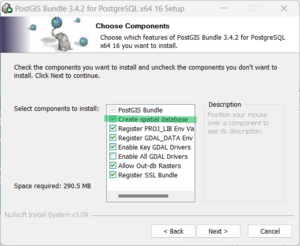
- In this page we will select Create spatial database if not selected. Then click Next.
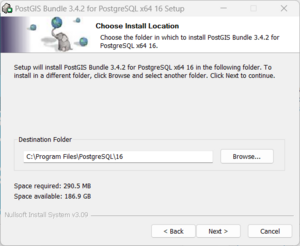
- You can now choose in which location you would like it to be installed. In our case the destination will be set to the PostgreSQL 16 program file as seen bellow.
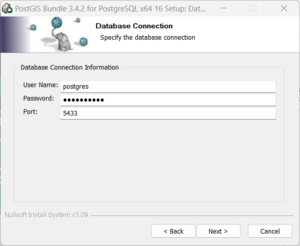
- A page to connect your database will now appear. On this page you will insert your username and password (This is the password you chose when setting up PostgreSQL earlier).
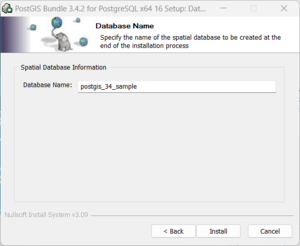
- You can now enter your database name. In this case we will keep what they have put. Clicking Next will begin the installation process.
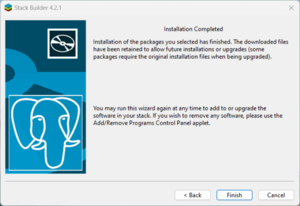
- Once the install is complete you should see the page below. You can click Finish to complete the process.
Uploading Data
Now that the PostgreSQL database has been installed and extended with the PostGIS extension. It is now possible to begin using PostGIS to manage data.
Create a Spatial Database
- The first procedure to storing data is to create a database to house the data. In this step we will create a database using the template created in the previous section.
- Execute the following command to create a spatial database using the spatial template;
createdb -T template_postgis ENV_CAN_DB
- ENV_CAN_DB, is the name of the database, enter whatever you would like as a DB name.
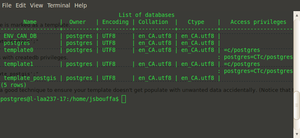
- To see the new database that you've created enter the following:
psql -l
- press the 'q' key once ready to return. Enter the exit command to return the shell prompt back to your normal user account.
- You can also run the test query previously executed on the template_postgis to test the new database.
Managing Data
Before uploading data it would be valuable to create a series of schemas to logical store your data.( Obe, Regina O. & Leo S. Hsu. 2010. PostGIS in Action. Manning Publishing.)[3]. But first it's time to open a GUI interface to communicate with PostgreSQL, which may facilitate further procedures, and help conceptualize the database that up until this moment has only been encountered via command line.
During the initial installation of posgresql, another application was installed called pgadmin3. Pgadmin3 is an application that allows the user to perform database duties via a GUI interface.
- In the command line enter the following (ensure you typed exit to quit the postgresql user shell in the previous section)
pgadmin3
- or, using the mouse:
Go to Applications -> Programming -> Pgadmin3
- Now that the interface is open, you will need to create a connection to your postgresql server.
- Click on the icon that looks like an electrical socket and you will get the following prompt.
- In the first field you will need to specify a name for the server, simply enter Postgresql or whatever you would like.
- In the host field, enter localhost.
- In the post field field you should have '5432' by default. If there are issues with this port number you can open /etc/postgresql/8.4/main/postgresql.conf using the following line
sudo gedit /etc/postgresql/8.4/main/postgresql.conf.
Once the file opens you will see a variable called port which will be assigned the default port number. That is the port number required to connect to the postgresql server.
- In the username field enter the name of the user you created.
- In the password field, enter the password for the username above.
- Press ok
- Now you should have a postgres icon in the dropdown below server on the left-hand side. Click on this to expand the postgres server. Now click on databases, and select the database you created using the template_postgis.
- Before continuing towards uploading data to your spatial database, schemas will be created to logically store our data. It is important to create schemas and not store data in the public schema.
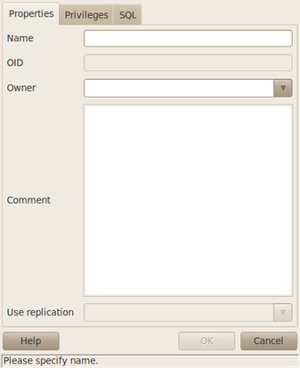
- In pgadmin3, right-click on schema and click on “new schema”. The following popup will appear.
- In the new schema form;
- Enter a name for the schema, which is representative of the data that will be stored in that schema.
- Indicate a owner if desired
- press ok.
- In the new schema form;
- The new schema is now created.
Uploading Data in QGIS
The following procedure will be to upload data. There are many different ways to go about uploading data into postgresql/postGIS.
- QGIS
- shp2pgsql
- shp2pgsql-gui
- and more...
In this tutorial we will demonstrate uploading data with QGIS. If QGIS is not installed enter following line;
sudo apt-get install qgis
Then proceed to
applications -> Science -> QGIS
- Once QGIS is open, load some vector layers. After adding vector files;
- click on the plugins menu, and then manage plugins.
- In the list of plugins, ensure SPIT is selected which will enable the import of vector files from QGIS to postgresql/postGIS.
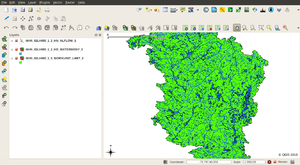
- (In this example I've added a portion of the National Hydro Network for tile 02LH000. (Geobase Data))
- Now click on the elephant icon, which is the SPIT tool, and the following prompt will open.
- Click on 'New' to open a new prompt to connect to the database.
- In the name field, enter a name for the connections
- In the host enter localhost
- In the database field enter the name of the database
- In the username, enter the name of the username
- In the password, enter the password for that username
- Click on test connection. If everything is good, proceed by clicking on ok.
- Once back at the main SPIT interface, in the dropdown select the database connection you want.
- Uncheck the SRID checkbox, it is always important to define a spatial reference ID for the data being uploaded, but for now you may want to leave it at -1 for ease of use.
- In this example I will use SRID: 92149 which is NAD83 UTM Zone 18N
- NOTE; There is a possibility that the SRID may not be in the Spatial_ref_sys table. If that is the case go to http://spatialreference.org/ and find the projection, and there should be an option labeled “PostGIS spatial_ref_sys INSERT statement” click on that link, copy the insert command, and execute the command in the SQL query browser in pgadmin3.
- In our case it will be necessary to execute the following line to add the spatial reference, which will be done within pgadmin3 in the SQL query editor before adding the data.
INSERT into spatial_ref_sys (srid, auth_name, auth_srid, proj4text, srtext) values ( 92149, 'epsg', 2149, '+proj=utm +zone=18 +ellps=GRS80 +towgs84=0,0,0,0,0,0,0 +units=m +no_defs ',
'PROJCS["NAD83(CSRS98) / UTM zone 18N (deprecated)",GEOGCS["NAD83(CSRS98)",DATUM["NAD83_Canadian_Spatial_Reference_System",SPHEROID["GRS
1980",6378137,298.257222101,AUTHORITY["EPSG","7019"]],TOWGS84[0,0,0,0,0,0,0],AUTHORITY["EPSG","6140"]],PRIMEM["Greenwich",0,AUTHORITY["EPSG","8901"]],UNIT["degree",0.0174532925199433,AUTHORITY["EPSG","9108"]],
AUTHORITY["EPSG","4140"]],UNIT["metre",1,AUTHORITY["EPSG","9001"]],PROJECTION["Transverse_Mercator"],PARAMETER["latitude_of_origin",0],PARAMETER["central_meridian",-75],PARAMETER["scale_factor",0.9996],
PARAMETER["false_easting",500000],PARAMETER["false_northing",0],AUTHORITY["EPSG","2149"],AXIS["Easting",EAST],AXIS["Northing",NORTH]]');
Once everything is completed, the spatial data is now stored within your Spatial Database!
Retrieving Spatial Data
The data is now sitting in your first spatial database, and is ready to be accessed and retrieved. This portion of the tutorial will demonstrate retrieving data using both the GUI approach in QGIS and the SQL approach in Open Jump.
Retrieving Spatial Data in Qgis
To retrieve data in QGIS is relatively easy. In QGIS look for the blue icon with a green plus sign that will have the caption “add postgis layer”.
- Click on the “add postgis layer” icon.
- Select the database from the list within the dropdown menu. If the database is missing, repeat the same procedure to add a database connection that was performed in the SPIT procedure.
- Click on Connect
- Select the schema, which will expand and list all the data you've uploaded.
- Select the data you want to retrieve, and press add.
Immediately following the last procedure, the spatial data will now be displayed.
Retrieving Spatial Data in Open Jump
In this portion of the retrieving data portion of the tutorial, Open Jump will be utilized. Using Open Jump will allow the execution of SQL queries to retrieve data. This will grant another perspective for retrieving data.
In the terminal enter the following command to open Open Jump.
Openjump
Depending on your version of Open Jump, you may need to download the latest version required for this tutorial. (Open Jump 1.4.0.2) If that is the case go to http://sourceforge.net/projects/jump-pilot/files/OpenJUMP/1.4.0.2/ to download the linux version which is in a .zip archive. (Likely the case with Ubuntu 10.04)
- Extract the archive
- In the terminal go to the folder /OpenJUMP/bin
- Execute the following command
sudo chmod +x oj_linux.sh
- This will make the file executable, and then enter the following command
sudo ./oj_linux.sh
- Open Jump 1.4.0.2 will open, which has the datastore query tool required for this tutorial.
NOTE Before Starting: Open Jump DataStore Query is finicky with names, ensure that all names are lower case for the schema, table, and column names. You may need to modify the table or schema name for the data you want. This is done within pgadmin3;
- Right-click on the schema or the table you want to modify.
- Click on Properties.
- In the name field, reenter the item's name in lower case.
- Click Ok.
Now that Open Jump is open;
- Click on Layer -> Run Datastore Query
- It will be necessary once again to establish a connection to the database.
- Click on database icon, click on add, and complete the required information as in the previous steps for QGIS.
- Once the connection has been established, enter the following command, but with the names of your database, and your data.
SELECT ST_AsBinary(the_geom), * FROM YourSchemaName.YourTableName;
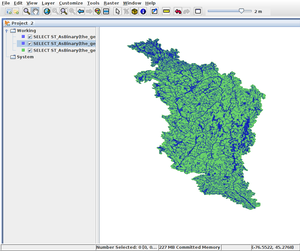
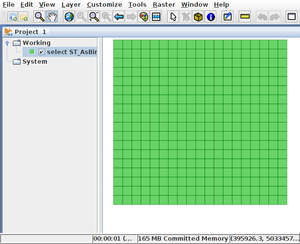
- Here is what I've entered to get the following screen capture.
SELECT ST_AsBinary(the_geom) FROM watershed.extent;
SELECT ST_AsBinary(the_geom) FROM watershed.waterbodies;
SELECT ST_AsBinary(the_geom) FROM watershed.streams;
- The first portion of the query is the “SELECT” statement, which determines what data columns you want returned with the execution of the query. Using PostGIS there is one important column that must be treated differently, and that's the the_geom column.
- The the_geom column is the column in each spatially enabled table, that stores geographic data for the feature. When calling the column in a query it is necessary to convert the PostGIS geometry to OGC standard binary format for Open Jump.( Obe, Regina O. & Leo S. Hsu. 2010. PostGIS in Action. Manning Publishing.)[4]. Different applications will require different conversions.
- Following the the_geom column conversion, a comma is placed and an * is used to quickly imply that all columns will be returned with the query. This basically means that all columns that you would have in an attribute table will be returned.
- The next portion of the query is the FROM statement which is used to specify the schema and the table where the data can be found.
- The last portion of the SQL query is always the semi-colon, which must be used or an error will be generated.
Advanced Functionality in PostGIS
As discussed earlier in the introduction, data can be processed to derive information to eventually derive knowledge. This need to generate information from data is crucial in Spatial Analysis, and in decision-making. When a spatial database is instantiated and utilized to house all the data for an organization, this database is an incredibly powerful tool that can be used to generate information.
In PostGIS there is a massive collection of various functions that can be called to manipulate, generate and process spatial data. All these functions are listed in the PostGIS documentation found at http://postgis.refractions.net/documentation/manual-1.5/
In this portion of the tutorial, basic advance functionality will be explained to demonstrate the abilities of PostGIS.
Advance Functionality Using Open Jump
- The first query that will be demonstrated is a query similar to the data retrieval query but with a where clause. The where clause is to used specify what data to return.
- In the Open Jump Datastore Query tool, enter the following command;
SELECT ST_AsBinary(the_geom),* FROM watershed.streams where gid >= 1 AND gid <= 500;
- NOTE: Once again, column names that are in uppercase will cause an error in OpenJump.
- In this query, all records from the streams table were returned if the gid column value was between 1 and 500.
- The second query that will be ran is a buffer query.This query is more intresting because it runs a buffer process without having to perform such an operation using a dekstop GIS application.
- To execute a buffer use the following syntax modified for your schema and table names.
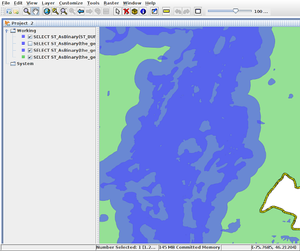
SELECT ST_AsBinary(ST_BUFFER(the_geom,0.005)),* FROM watershed.waterbodies where gid = 1045;
- This query will create a buffer region around the waterbody with the gid value 1045.
- The following query will demonstrate how to perform a union between two polygon files. In this query I've specified a range for waterbodies table, because this function is memory consuming and will crash Open Jump.
- In the Open Jump Datastore Query tool, enter the following command;
select st_asbinary(ST_Union(waterbodies.the_geom,extent.the_geom)),*
FROM watershed.waterbodies, watershed.extent where waterbodies.gid >= 1 AND waterbodies.gid <= 10;
- If you look in the attribute table of the newly processed polygon, you will see that the union between the extent and the waterbodies has merged the records together.
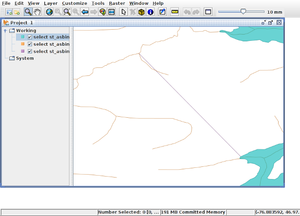
- This last query in OpenJump will demonstrate how to have a line drawn between two features that is the shortest path.
- In the Open Jump Datastore Query tool, enter the following command;
select st_asbinary(st_shortestline(waterbodies.the_geom,streams.the_geom)), * From watershed.waterbodies, watershed.streams
Where waterbodies.gid = 1273 AND streams.gid = 10735;
- As you can see in the image above, a line has been generated displaying the path of the shortest distance between both features.
Advance Functionality performed Using Pgadmin3
In pgadmin3 using the sql query builder, queries can ran on the data to get characteristics of the data without having the visualize the data.
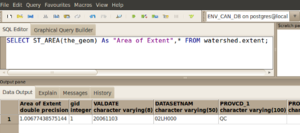
- In this first query, the area of a polygon will be returned.
- Enter the following command in the pgadmin3 SQL query tool.
SELECT ST_AREA(the_geom) As "Area of Extent",* FROM watershed.extent;
- This query returns the area for the polygon as seen in the screen capture below.
- The next query will return the boolean true or false, if a shape is within another shape. In this example I've queried if the waterbodies are all within the extent polygon.
- Enter the following command in the pgadmin3 SQL query tool.
SELECT ST_Within(waterbodies.the_geom, extent.the_geom) As "Is the water boby within this extent" FROM watershed.extent, watershed.waterbodies;
- This will create a list of all the waterbodies records and indicate whether true or false, the waterbody is within the extent.
- In this last example of using pgadmin3, the distance between two features will measured using the ST_Distance function.
""Enter the following command in the pgadmin3 SQL query tool.
select st_distance(waterbodies.the_geom,streams.the_geom) As Distance, * From watershed.waterbodies, watershed.streams
Where waterbodies.gid = 1273 AND streams.gid = 10735;
- This will generate a column labeled distance that will contain the distance between both features specified in the where clause.
PostGIS Raster
The following section is for the adventurous who want to begin testing the PostGIS Raster functionality that is currently in development. The stable version of PostGIS Raster is anticipated to be released in the summer of 2011, in PostGIS 2.0. The following section will require that the unstable version of PostGIS 2.0 be installed from source.
Installation
- Download the latest PostGIS 2.0 snapshot from http://postgis.refractions.net/download/
- Within a terminal go to the folder location of the downloaded package
- In the terminal enter the following; ( PostGIS 2.0 Documentation)[5].
tar xvfz postgis-2.0.0SVN.tar.gz
cd postgis-2.0.0SVN
./configure –with-raster
make
make install
- you will need to create a new spatial database template, with the following lines of code in the postgresql-client. (sudo su postgres)
createdb yourdatabase
createlang plpgsql yourdatabase
psql -d yourdatabase -f postgis.sql
psql -d yourdatabase -f spatial_ref_sys.sql
psql -d yourdatabase -f rtpostgis.sql
- The entire process is similar to how the spatial database template was created in the first portion of the tutorial, the only differences are the paths for the files, and the additional “psql -d yourdatabase -f rtpostgis.sql” to extend the raster functionality in the spatial template.
- Once this is complete test the PostGIS spatial template with;
psql -d new_template_postgis -c "SELECT postgis_full_version();"
Upload Raster File
- Once the new template is good to go, create a new database, a new schema, and upload your raster file using the raster2pgsql.py script, using the following line of code in the terminal, not postgres-client.
- Format;
Python /path/of/raster2pgsql/script -r /path/of/raster/image/image.tif -t schema.tablename -l 1 -k 200x200(size of tiles) -o sql_script_generated.sql -s SRID -I -M
- This is the script that I've utilized to generate a script that will upload the raster file.
python /home/jsbouffa/Downloads/postgis-2.0.0SVN/raster/scripts/python/raster2pgsql.py -r /home/jsbouffa/Downloads/aerial/S4_07550_4536_20060830_m20_1_utm18.tif
-t raster.rastertiled -l 1 -k 200x200 -o upload_dem.sql -s 92149 -I -M
- Now open a postgres-client session in terminal and enter the following line;
- Format;
psql -d databaseName -f nameOfGeneratedSQLFile.sql
- This is what I executed;
psql -d ENV_CAN_DB -f upload_dem.sql
- Now the script has been uploaded with the database.
Retrieve Raster Image
Retrieving the data is not as many might think within Open Jump. Open Jump will returned a polygon representing the raster with values. To my knowledge the only method possible for displaying the actual raster as an image format will need to utilize the GDAL PostGIS raster tools, which are currently available in Mapserver, but not in Open Jump. ( PostGIS Raster Frequently Asked Questions)[6].
The following command will only display the extent of the raster;
select ST_AsBinary(rast::geometry), * FROM raster.rastertiled;
The rast::geometry type casts the raster into a polygon to display the extent.
This concludes the portion for PostGIS Raster.
Conclusion
In this tutorial the value of data management was not only demonstrated for data storage purposes to adequately manage data, but it also demonstrated the additional capabilities within PostGIS that uses the stored data to produce valuable information. In this tutorial the reader should now have a basic understanding of the following;
- Installing PostgreSQL / PostGIS
- Managing & Uploading Data
- Retrieving Data
- Advance Functionality in PostGIS
- and Basic PostGIS Raster Capabilities
Contributions to This Tutorial
This tutorial will hopefully evolve as PostGIS and other software utilized in this tutorial evolve. I would like to promote any additions to this tutorial that may contribute to enhancing the quality of this tutorial. The following is a list of areas that I would specifically encourage contributions;
- PostGIS Raster & Mapserver
- Advanced Functionality in PostGIS
About This Tutorial
This tutorial was created for GEOM4008 which is part of the Geomatics program at Carleton University, located in Ottawa, Ontario, Canada.
External Links
Here is a list of links that are either additional support or other tutorials of interest;
- Bash Linux Shell Commands - http://ss64.com/bash/
- PostGIS 1.5.2 Manual - http://postgis.refractions.net/documentation/manual-1.5/
- PostGIS WKT Raster Tutorial 1 - http://trac.osgeo.org/postgis/wiki/WKTRasterTutorial01
- Spatial Reference - http://spatialreference.org
- Open Jump - http://www.openjump.org/
- Quantum GIS - http://www.qgis.org/
- GDAL - http://www.gdal.org/
- Ubuntu - http://www.ubuntu.com/
- OSGeo - http://www.osgeo.org/
References
- Spatial Data in Webopedia. 2010. http://www.webopedia.com/TERM/S/spatial_data.html
- PostgreSQL 8.4 Documentation.2009. http://www.postgresql.org/docs/8.4/static/
- Obe, Regina O. & Leo S. Hsu. 2010. PostGIS in Action. Np:Manning Publishing.
- PostGIS Template Database in GeoLabs. 2006. http://geospatial.nomad-labs.com/2006/12/24/postgis-template-database/
- PostGIS Raster Frequently Asked Questions. http://postgis.refractions.net/documentation/manual-svn/RT_FAQ.html
Data
- National Hydro Network. Geobase. http://www.geobase.ca
