Evaluating Landscape Permeability in Quantum
Disclaimer
Please note that this Wiki tutorial has been produced for the GEOM4008 Advanced topic in Geographic Information Systems class at Carleton University.
Introduction
The objective of this project was to develop a method to evaluate landscape permeability for large carnivores using only free and open-source software (FOSS). This tutorial has been created to allow non-GIS individuals to successfully complete this analysis in Quantum GIS (QGIS) using the Grass Plugin. This tutorial will be carried out while analyzing the landscape permeability for grey wolf movement on Vancouver Island. The final result from this project will be a landscape permeability map and provide invaluable insight into the movement of the grey wolf. This information can be used to implement more successful conservation strategies, facilitate ecosystem-based management (EMB), and better understand the genetic flow in the island’s population.
Data
Before beginning this tutorial in QGIS a variety of data is needed. In order to evaluate landscape permeability the data must be specific to the area and animal chosen to analyse. After the animal has been chosen parameters that would inhibit movement in the study area should be studied and then data must be located. For our analysis of movement on the grey wolf on Vancouver Island we used a combination of freely available data, as well as data we created for the purpose of this tutorial. See Table 1 for the data used and the source of the data.
| Data Used | Data Source |
|---|---|
| Boundary of Vancouver Island | Scholars Geoportal Layer: Dissemination Blocks - Cartographic Boundary File (DB-CBF), 2011 Census / Producer: Statistics Canada |
| Lakes | Scholars Geoportal Layer: Minor Water Regions (MNWTR) / Producer: DTMI Spatial Inc. |
| Roads | Scholars Geoportal Layer: Route File (RTE) / Producer: DTMI Spatial Inc. |
| Parks | Scholars Geoportal Layer: Parks and Recreation - Region / Producer: DTMI Spatial Inc. |
| Landcover | GeoBase Layer: Land Cover / Producer: Circa 2000 |
| DEM | GeoBase Layer: Canadian Digital Elevation Data / Producer: Natural Resources Canada |
| Grey Wolf Range | Created Data |
| Deforestation on Vancouver Island | Created Data |
| Hunting Camps | Created Data |
Methods
It is highly recommended that these methods are done in order.
Before QGIS
Before you can begin in QGIS you must first locate all the data that you wish to use. A good place to start if you are unsure where to find free data would be Scholars Geoportal and GeoBase. Links to these sites can be found in Table 1. Once you have found all the data you wish to use create a folder in your computer and place the data in this folder.
Opening QGIS
Before beginning ensure that Quantum GIS is installed on the computer you wish to use. If you do not have QGIS installed, download QGIS.
Once the installation has been completed, or if QGIS was already installed, click the QGIS icon to open the program.  This will open the initial QGIS window.
Immediately go to the File Tab and click Save As. Save your project in the folder with all your data. IMPORTANT NOTE: Remember to save your project often.
This will open the initial QGIS window.
Immediately go to the File Tab and click Save As. Save your project in the folder with all your data. IMPORTANT NOTE: Remember to save your project often.
Installing the Grass Plugin
Once the initial QGIS window has been opened it is highly recommended that the GRASS plugin be installed next. The Grass plugin allows the tools from Grass to be used within QGIS.
- Go to the Plugins Tab, and click Manage Plugins.
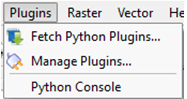
- This will bring you to the QGIS Plugin Manager Window.
- Scroll down to find the GRASS Plugin,
- Click on the box and make sure there is an x in the box.
- Finally, click OK.
- Go back to the Plugins Tab, a new GRASS Tab should have appeared.
- Hold your curser over Grass and a new Grass list will appear. As you can see most of the tools are grayed out.
- In order to fix this click on New Mapset. The Mapset is the location where you want your grass files to be stored.

- Click browse and go to your chosen destination.
- Once you have browsed to the location, click Next.
- Now you will create a new GRASS location. We named our “GRASS”. Then click next.
- This will bring you to the Projection window. Defining your projection is extremely important.
- Click the circle beside Projection. You must chosen the projection based on your study location. ***link to website*** As our location is in Vancouver Island we chose Universal Transverse Mercator (UTM), NAD83 (NSRS2007) /UTM zone 10N.
- Once you have chosen your projection click Next. This will bring you to the Define GRASS Region Window.
- Scroll to the country your study area is in and click Set, then click Next. This will bring you to the Mapset window.
- Name your new Mapset. We named our “Mapset”. Click Next, and then click Finish. Your new mapset has now been created!


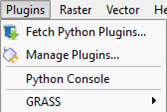
If you go back to the Plugins Tab you can see that the tools are no longer greyed out. Depending on the computer you are using you may have to open the mapset every time you open and close QGIS. In order to do this go to the Plugins Tab, Click GRASS, and click Open Mapset.![]()
Add Vector Layers to QGIS
To add vector layers, click the “Add Vectors layer” button at the top left of the screen. ![]() Browse to the location were you saved your data and click open.
For this project we added the boundary of Vancouver Island, roads, lakes, parks, landcover, grey wolf range, hunting camps, deforestation as they were all vector layers.
These layers will appear in the Table of Contents (T of C) on the left.
Browse to the location were you saved your data and click open.
For this project we added the boundary of Vancouver Island, roads, lakes, parks, landcover, grey wolf range, hunting camps, deforestation as they were all vector layers.
These layers will appear in the Table of Contents (T of C) on the left.
Add Raster Layers to QGIS
To add a raster layer, click the add raster layer button. ![]() Again navigate to the folder with data and chose the w001001.adf file.
Then click Open. These layers will show up in the T of C on the left.
The raster layer we added was the DEM.
In the T of C right click on the layer that says w001001.
Click on properties.
Within the layer properties go to the General Tab.
Under Display name give the layer an appropriate name. We named ours DEM.
Next go to the Style Tab.
Change the Colour Map to be Pseudocolour. Then click OK.
Again navigate to the folder with data and chose the w001001.adf file.
Then click Open. These layers will show up in the T of C on the left.
The raster layer we added was the DEM.
In the T of C right click on the layer that says w001001.
Click on properties.
Within the layer properties go to the General Tab.
Under Display name give the layer an appropriate name. We named ours DEM.
Next go to the Style Tab.
Change the Colour Map to be Pseudocolour. Then click OK.
Edit Current Grass Region
It is very important to edit the current grass region
In order to do so go to the Plugins Tab, click on Grass and then click the Edit Current Grass Region Button. ![]() The extent can be created by drawing an area of interest around your boundary layer. Then click OK.
The extent can be created by drawing an area of interest around your boundary layer. Then click OK.
Clipping Vector Layers to AOI boundary
Import Vectors to Grass
Convert Vector to Raster
Import Raster to Grass
Conclusion
Helpful Links
Welcome to the Quantum GIS Project