Change Detection using Whitebox
Contents
Disclaimer
Please note that this tutorial has been created for GEOM 4008 Advanced Topics in Geographic Information Systems at Carleton University in order to demonstrate a method of change detection analysis using Free and Open-Source Software (FOSS). It is highly recommended that these steps are followed in the order that they appear to avoid confusion. The tutorial is set up to be performed on a Windows operating system.
Purpose
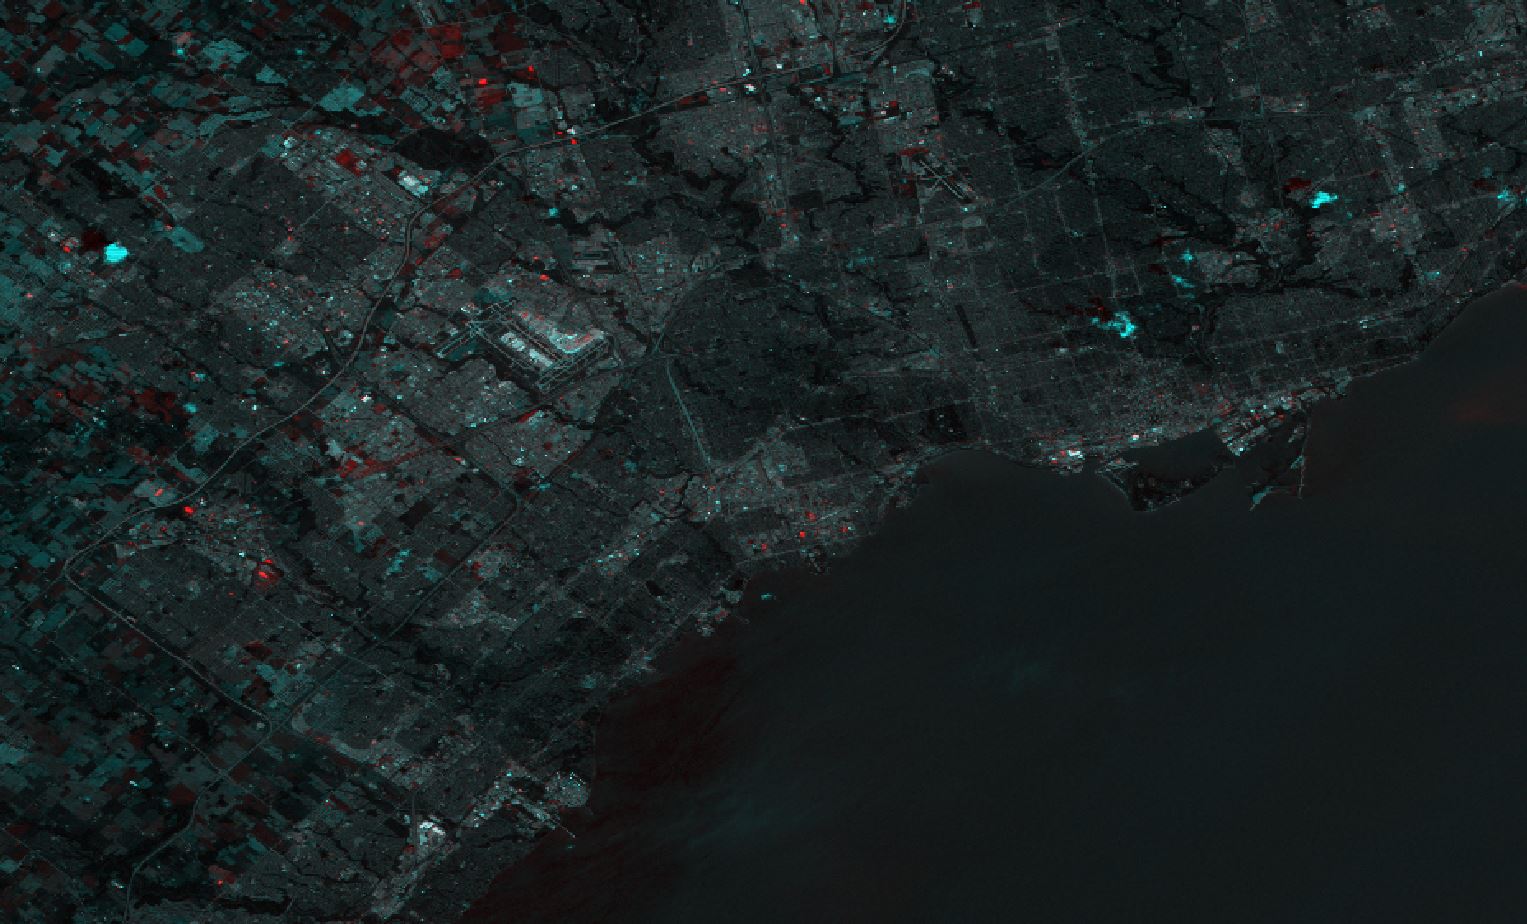
The purpose of the project was to develop a method to detect change in an environment using FOSS. This tutorial has been created to allow individuals who are not familiar with GIS to successfully complete this analysis using Whitebox (3.2.1). This tutorial will be carried out by analyzing the temporal changes that occur in a subsection of the Greater Toronto Area (GTA). The end result of this tutorial will be the creation of a change detection map using the write function memory insertion method. This will provide qualitative insight into the temporal change of land cover in a subsection of the GTA.
Data
In order to perform a change detection analysis, satellite imagery is required. For this tutorial, Landsat imagery of the GTA will be used and can be found by in the United States Geological Survey (USGS) Landsat image database using the search tool Earth Explorer.
Note: A free account with the USGS is required to download the required Level 1 satellite data and to also have the option for batch downloads.
Whitebox Installation
Whitebox can be downloaded from the following link, and the zip file can be extracted to a user defined location. Whitebox unlike other programs does not require the software to be installed onto a computer. Instead, Whitebox runs as an executable jar file which uses Java to operate, meaning that Java must be installed on the computer to operate.
Note: While running Whitebox, an out of memory error window can occur. To fix this issue a 64-bit version of java is required. The following link, gives a detailed explanation as to why the error occurs along with the steps necessary to fix the error.
Methodology
Starting Whitebox
- Click on WhiteboxGIS file
Adding Landsat Data
The type of change detection analysis being performed requires two different Landsat Bands. The first Landsat band is band one from the 2004 Landsat image and band one from the 2011 Landsat image.
- Click on the Tools tab above the table of contents on the left
- Click Data Import/Export from the available tools
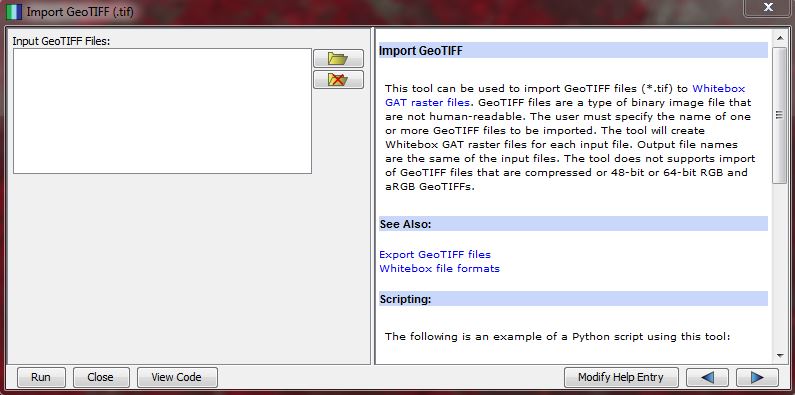
- Click Import GeoTIFF (.tif)
- The Import GeoTIFF window will appear
- Click on the open folder icon
- Browse to the location where the Landsat images were extracted too
- Select Band one from the 2004 Landsat image
- Click open
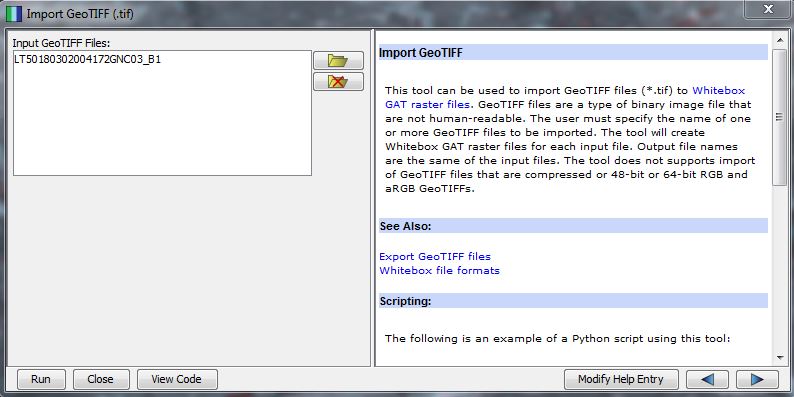
- Band one for the 2004 Landsat should now appear within the dialog box of the Import GeoTIFF window
- Click run to add band one to Whitebox
- This process is repeated for band 1 for the 2011 Landsat image
Changing Projection
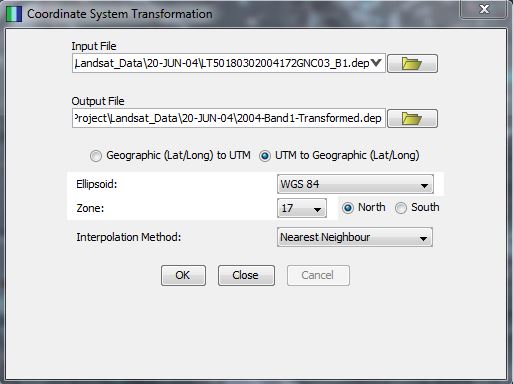
Each band will be transformed into WGS 84 UTM Zone 18N.
- Click on the Tools tab above the table of content on the left
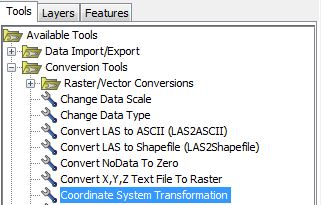
- Click Conversion Tools from the available tools
- Click on Coordinate System Transformation
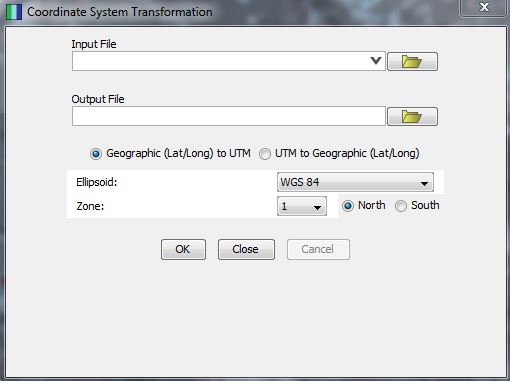
- The Coordinate System Transformation window will appear
- Click on the open folder relating to the input file
- Browse the location of band one for the 2004 Landsat image
- Select the band one file with the .dep extension
- Click Open
- Click on the open folder relating to Output File
- Save the file in the same folder as the non-transformed band with the following name 2004-Band1-Transformed
- Click save
- Select UTM to Geographic (Lat/Long)
- Select WGS 84 for the ellipsoid
- Select Zone 17 and North
- Select Nearest Neighbour for Interpolation Method
- Click Okay to perform the transformation
- This process is repeated for band one of the 2011 Landsat image.
Adding Transformed Data
- Browse to where the transformed band is located
- Select the transformed band
- Click Open
- This process is repeated for band one of the 2011 Landsat image.
Setting Area of Interest
Note: Whitebox currently has no way of modifying the vertices of a polygon shapefile. As a result, the area of interest will be manually selected.
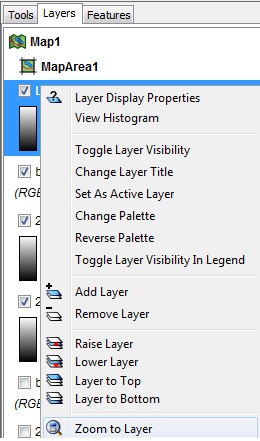
- Click on the layers tab above the table of content on the left
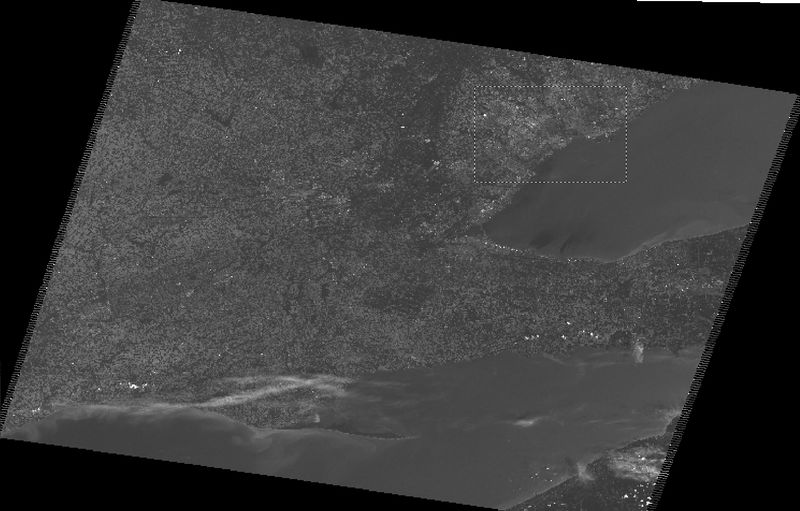
- Right click on one of the transformed bands and select zoom to layer
- Click the zoom in button in the toolbar at the top
- With the zoom in button selected
 from the top toolbar, click and drag on the image, creating a square around a portion of the GTA
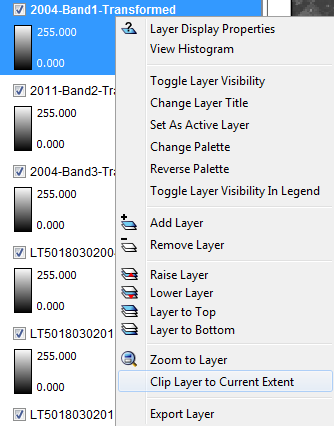
- Right click on 2004-Band1-Transformed layer found in the layers tab
- Click Clip layer to current extent
- A popup window will appear, giving you the option to name the new layer. Call the new layer 2004-Band1-Transformed-Clipped making sure to use the same naming format for the 2011 Landsat Band
- This process is repeated for band one of the 2011 Landsat image.
Adding Clipped Data
- Browse to where the clipped 2004 band is located
- Select the clipped band
- Click Open
- This process is repeated for band one of the 2011 Landsat image.
Band Normalization
This step is to normalize the two Landsat bands to each other.
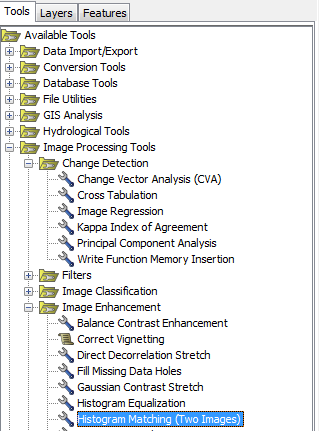
- Click on the Tools tab above the table of contents to the left
- Click on the Image Processing Tools under Available Tools
- Click on Image Enhancement
- Click on Histogram Match (Two Images)
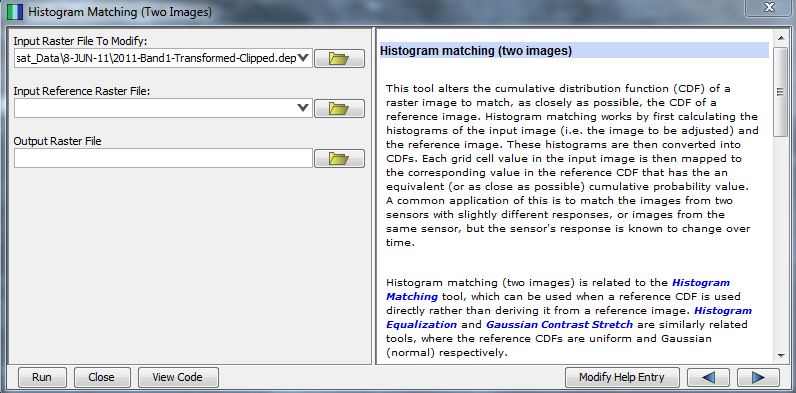
- The Histogram Match (Two Images) window will appear
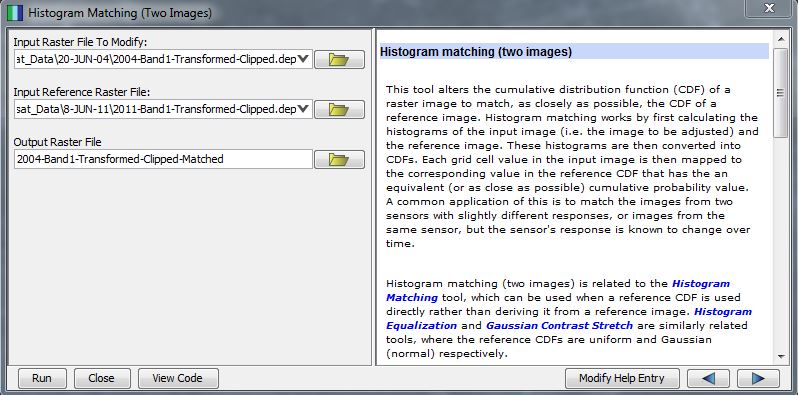
- Click on the open folder relating to the Input Raster File To Modify
- Browse too and select 2004-Band1-Transformed-Clipped
- Click on the Input Reference Raster File
- Browse to and select 2011-Band1-Transformed-Clipped
- Click on the folder relating to the Output Raster File and name the file 2004-Band1-Transformed-Clipped-Matched
- Click Run to perform the histogram matching
Write Function Memory Insertion
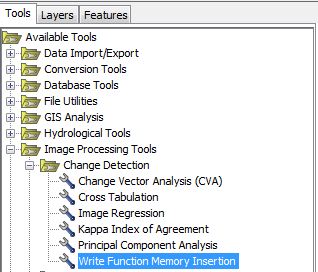
- Click on the Tools tab above the table of contents to the left
- Click on the Image Processing Tools under Available Tools
- Click on Change Detection
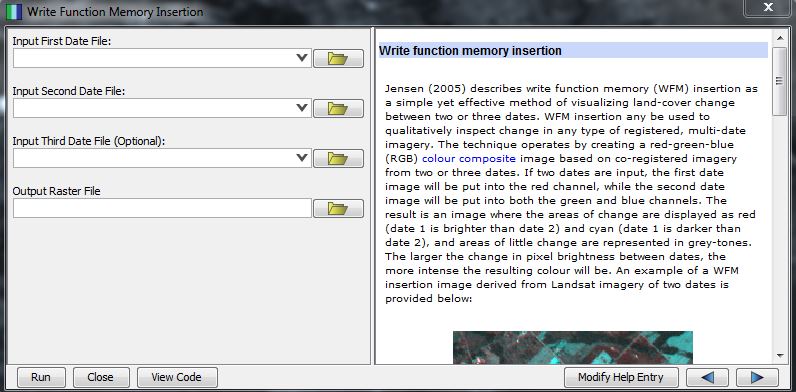
- Click on Write Function Memory Insertion
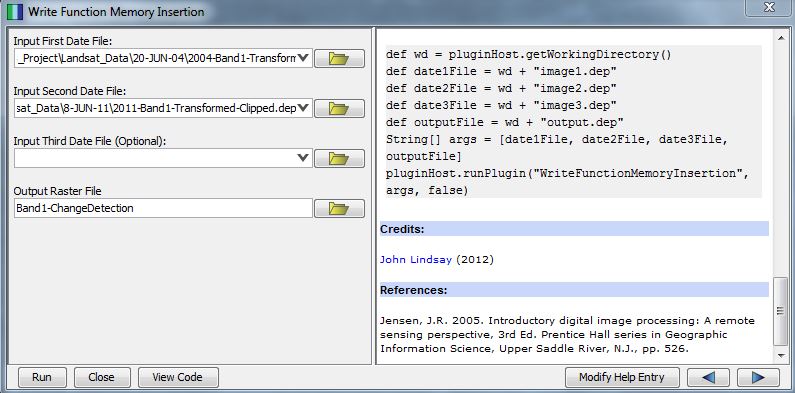
- The Write Function Memory Insertion window will appear
- Click on the folder relating to the Input First Data File
- Browse to and select the 2004-Band1-Transformed-Clipped-Matched
- Click on the folder relating to the Input Second Date File
- Brose to and select the 2011-Band1-Transformed-Clipped
- Leave the Input Third Date File blank
- Click on the folder relating to Output Raster File and name the file Band1-ChangeDetection
- Click Run to perform the Write Function Memory Insertion
- Output of write function memory insertion change detection method
Conclusion
The final product of the tutorial is a qualitative assessment of temporal change occurring in the selected area of the GTA . The method of change detection used, write function memory insertion, is one of the many methods available in Whitebox. Although Whitebox does have some limitations, particularly with vector data, it has proven to be very effective in its ability to handle Landsat imagery for change detection analysis.
References
Whitebox Geospatial Analysis Toolbox Help
Jensen, J.R. 2005. Introductory digital image processing: A remote sensing perspective, 3rd Ed. Prentice Hall series in Geographic Information Science, Upper Saddle River, N.J.


