Interferometry in ISCE with ALOS Imagery
The Interferometric synthetic aperture radar Scientific Computing Environment (ISCE).
Note that this tutorial is only compatible with Linux and MacOS. ISCE is not currently supported on a Windows environment.
ISCE does not offer a Graphical User Interface([1]), which may be intimidating for some users. Although it is not necessary, some experience with the following tasks is recommended:
- Using the Command Line (Terminal)
- Setting up a Conda environment
- Writing and executing scripts in Python
Download the Data
Sentinel-1 imagery is freely available...
Installation
A Conda environment will be used to manage software dependencies so the user must only be concerned with having Anaconda installed on their computer. Click here for instructions on installing Anaconda. Once Anaconda is installed, open a new terminal and enter the command:
conda init
this sets up a base Anaconda environment that will allow you to access certain commands and libraries directly from the command line.
Download the Conda environment:
ISCE-2 has a number of dependencies and highly is susceptible to versioning conflicts. By using a virtual environment, the packages (and their versions) will be uploaded to a separate space on your computer rather than in the root file. An environment configured for ISCE-2 has been uploaded to the Anaconda cloud, to create this environment locally, execute the following command:
conda env create allyplourde/ISCE2
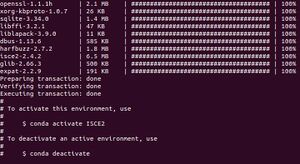
Shortly after running the command, you should see packages beginning to be installed one by one.
This step may take a while to complete. While waiting, here is something interesting to look at... something interesting here
Once the installation is complete, the environment must be activated.
After sending the following command
conda activate ISCE-2
you can observe that the <ISCE-2> environment is pre-pended to your working directory path.
Creating the ISCE-2 Conda environment has already taken care of its installation as well as setting some global variables. To confirm ISCE-2 has been successfully installed, use this echo command:
echo $ISCE_HOME
This should output the path to the folder where isce-2 has been installed
Finally, to test the installation, run the following command:
python $ISCE_HOME/applications/stripmapApp.py --help
This will output information about the stripmapApp python application including a description and configuration guidelines.
