Noise Modelling using WPS Modelling to determine noise emissions
Contents
Introduction
Purpose
The objective of this tutorial is to determine the noise emissions caused by traffic and by construction going on at Carleton University during a typical day. We will be using Noise Modelling v4.0 which is a free application that can be downloaded and used on any computer.
Downloading Noise Modelling v4.0
This tool can be downloaded off of the GitHub page here Noise Modelling. There are different requirements for the environment depending if you use Windows or Linux so make sure to check this page to make sure your Java meets the requirements. Once downloaded you simply need to go to where you downloaded the files and run NoiseModelling_xxx_install.exe and this will install all that you need.
To start the tool simply run NoiseModelling.exe or double click on the desktop icon that gets created. This will open a page on a internet browser that is either open or on your computer
- Desktop icon.jpg
Desktop Icon
- Blank Page.jpg
Noise Builder Blank Page
Preparing the Data
I have provided you with Data that contains the Buildings, Roads that you will need to run this tutorial.
Once you have the Data downloaded you can open either ArcGIS Pro or QGIS, but in this tutorial I will be using ArcGIS Pro. Create a new project and make sure that your project is set to a metric projection system. For the Ottawa area you can set it to NAD83 / UTM Zone 18N (EPSG:26918).
Buildings
Place the downloaded Buildings shapefile that you downloaded into your project and make sure that it's projection is EPSG:26918 by looking at it's properties. If it is not use the "Project" tool to change it's projection.
The model builder requires that the attribute table contains the Geometry and the Height of the buildings. To see the specifics on what the attribute table should contain take a look at this Building Requirements page. If you do not have the height provided with your buildings shapefile find a surface model of the area you are looking at and find the correct heights in meters for each of your buildings. For this exercise we are assuming that all the buildings are one height.
Roads
Place the downloaded Roads shapefile that you downloaded into your project and make sure that it's projection is EPSG:26918 by looking at it's properties. If it is not use the Project tool to change it's projection.
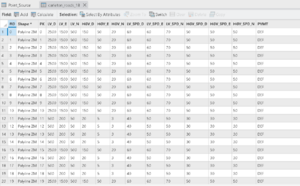
The model builder requires that the attribute table contains the Geometry and a Primary Key (PK) identifier, an object ID. For this exercise we will also be including LV_D, LV_E, LV_N, HGV_D, HGV_E, HGV_N, LV_SPD_D, LV_SPD_E, LV_SPD_N, HGV_SPD_D, HGV_SPD_E, HGV_SPD_N, PVMT. These are categories that look at the hourly number of light and heavy vehicles and their speed for Day, Evening and Night, as well as the pavement type. To see the complete list of variables and descriptions please see this Roads page.
We have filled in the attribute table for you, but you can make changes to see the impacts it makes on the final product at your convenience.
Points Source
We need to create our own Point Source layer for where the construction equipment is located. First create the new point layer using the "Create Feature Class" tool. When creating the new layer make sure that it is in the correct projection EPSG:26918.
Make sure that your attribute table contains the Geometry, PK and LWD500, LWE500, LWN500 which is the sound level at 500Hz frequency and a height. You can use this website to look at typical construction noise sound levels.
Once the attribute table is set up, go to the edit tab and find the "Create" button. Select, the Point Source layer you just created and add points were you want construction noise to come from. Make sure to save your edits. Open the attribute table again and fill in the noise levels. The height is how high the sound originated from, you can choose whatever is reasonable here.
After all the attribute table is filled out use the "Feature To 3D By Attribute tool", use the Point Source as the input and use the Height as the two height fields. This will turn the 2D shapefile into a 3D shapefile which is needed for the Noise Modelling.
- Point Source Location.jpg
Point Source of Construction on Campus
- Point Source Attribute Table.jpg
Point Source Attribute Table
Receiver
The last shapefile that needs to be prepared are the Receiver Points. These will be used as the base points where the noise emissions will be calculated. To make them go to the "Create Fishnet" tool. Fill in the output name something you will remember for example: Carleton_Receivers. Use the buildings layer as you Template Extent. We have used the Cell Size Width and Height as both 50m. This will depend on how large your area of interest will be and how detailed you want to get. Make sure that the Create Label Points is checked on as this label layer is the one you will want to use as it is a point layer. Make sure it is still in the correct projection EPSG:26918.
Add in a height attribute like you did with the Point Source and repeat the process of turning the 2D shapefile into 3D.
- Fishnet map.jpg
Receiver Points over Campus
- Fishnet Table.jpg
Fishnet ArcGIS Pro Input
Using Noise Modeling Level from Traffic
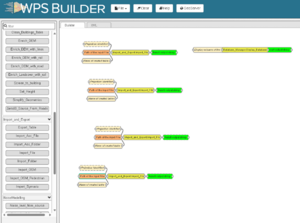
After you open the Noise Modelling tool the web browser will open to a blank Builder screen. On the left hand side there will the all the tools that you can use. You just need to click and drag the box over onto the Empty builder page. To run a tool you need to click on one of the boxes pertaining to the tool then click the Run Process button in the top right corner of the screen.
When a tool is run properly you will receive a message on the right in the console. If it does not run and error message will occur on the console screen.
Importing Files
To start you will use the Import_File tool under Import_and_Export section. You will want to do that 4 times. The Orange boxes are mandatory for the tool to run whereas the beige are optional.
Add Display_Database that is found under Database_Manager. This is a helpful tool to see what tables are on the console. On the Display columns of the table check the box showColumns then run process.
Place the location of your file in the Path of the input File, then it is recommended to give the table a unique name in Name of created table, we have used carleton_roads, carleton_receivers, carleton_buildings and Point_Source. It is very important that you write the EPSG:26918 code in the Projection identifier for each file or the tools later will not work.
Calculating Noise Level from Traffic
In this step drag the Noise Level from Traffic tool box that is found under NoiseModelling into a section with lots of vertical empty space on you board. Fill in the table names that were imported for the Receiver, Buildings and Roads. If you need to keep running the Display Database tool to see what your table names of set as. This will create 4 tables, LDAY_GEOM, LDEN_GEOM, LNIGHT_GEOM and LEVENING_GEOM.
There are many optional boxes to fill in for this tool. Feel free to find the suitable data and fill in the boxes as per the instructions to get more accurate data to your situation.
- Noise from traffic 1.jpg
Noise Level from Traffic Boxes Part1
- Noise from traffic 2.jpg
Noise Level from Traffic Boxes Part2
Exporting Results
Find the Export_Table tool under Inport_and_Export, and drag it onto the screen. Input the name of the table you want to look at for example LDAY_GEOM for the day time results, and input the path that you want to place the file in. This path must include the folder location you want, then the name you want the file to be, then the type of extension in our case shp. ...\...\...\results\LDAY_TRAFFIC.shp Do this for all 4 tables.
Using Noise Modeling Level from Source
The files you uploaded at the beginning stay on the console the entire time unless overwritten by a newer upload with the same name. Since we have all the tables we need, just find the Noise_level_from_source tool under NoiseModelling and drag it onto the screen. As you did with the Noise from traffic, fill out the table names for Receivers, Buildings and now sources and run the tool. As with the Noise from traffic, the Noise from Source has many optional variations that you can play with to get more detail with your results.
Make sure that you have already exported all the the previous tables as running this tool will override the previous tables data.
- Noise from Source 1.jpg
Noise Level from Source Part1
- Noise from Source 2.jpg
Noise Level from Source Part2
Visualizing the Results
Now we can go back to the ArcGIS Pro project we had started and add in all the layers that we have just exported. Open the symbology tab for each and change it from Single Symbol to Graduated Color and set the value to the LAEQ column which stands for the Equivalent Continuous Sound Pressure Level.
Saving your Work
When you are finished or at anytime you can click on the File button at the top of the page and you can save your builder to the local browser storage. When you open the Noise Modeler the next time, you will see a blank page. Just click on the File button again and open from local browser will open from the last time you saved. You can also Import and Export the clipboards to share your work with others.
Conclusion
This WPS Builder has many more tools that can be used for Noise Modelling that I have not touched upon. These range from Geometric tools, to Matsim, acoustic, experimental and building your own receiver grids. It is great that this tool runs on its own server so as long as you have a good connection to the internet, it will run the processing on its own. The thing to look out for when using this tool is that the requirements for each box is very specific, so you need to pay attention to what it asks or else it will give you error messages.
This is the end of the tutorial, I hope you have enjoyed working through this scenario and have a basic grasp of how to use the Noise Modelling tool.
Feel free to make and edits and improvements on this page as we are constantly trying to improve these tutorials.


